How to Print, Reinforce & Attach Your Tags
STEP 1: PRINT
HOW TO PRINT YOUR TAGS.
- Login to your MyCM account.
- Click on the Print Tags tab and you will see a list of all your items.
- You can choose to see from 24 to 216 entries at the drop down list at the top left of the page. You can choose to print your tags all at once, or at different times. Each page makes 8 tags, so it is wise to print tags in multiples of 8.
- Select your items individually or click the Check All box.
- Click on the Generate Tags button and click on the link to download and open a PDF file of your generated tags.
- Print your tags using the required printer and paper as listed below.
- After you print your tags, please add your own "mark" to your tags to make them uniquely your own. This will help the volunteers sort items quickly and accurately after the sale. Try to make these marks consistent (i.e. same color, same place on the tag). You can mark each tag with the same rubber stamp, sticker, or handwritten symbol (star, heart, etc.). Or you can highlight something on the tag (i.e. seller number, or along the top of the tag) with the same color. But just make sure you DO NOT COVER THE BAR CODE!
PAPER REQUIREMENTS.
Tags should be printed on white or light colored paper 160 g or heavier.
(U.S. paper equivalent is 60#, 65# or 67# cardstock).
- NO dark colors. WHITE is the best.
- Do NOT print on regular copy paper (80-90g) unless you plan to laminate your tags. The tags will tear, wrinkle and bend, and the scanners will not be able to read the barcode (and we will not be able to sell your item).
- No fuzzy or textured paper because the barcodes will bleed.
- No PHOTO PAPER!!! It is impossible for the barcode scanner to read the barcode--we know this from experience!!
PRINTER REQUIREMENTS.
It is best to use an inkjet printer on the normal print setting.
- Laser printers are fine to use, but do not use dot matrix printers.
- Use the NORMAL print setting--best quality is too dark and causes the barcodes to bleed.
- If the barcode lines bleed together or you cannot see white lines between the barcode, reprint using a lower print quality such as the "draft" setting.
- If you have a color printer, select "Black Cartridge Only" from the printing properties screen. Otherwise, the tags can appear purple and blurry.
STEP 2: REINFORCE
To ensure the durability of your tags, make sure you have printed your tags on heavy weight paper (160g or heavier). Put a piece of clear packing tape along the BACK and over the TOP PART of the tag, covering the area marked "pin here." Then use your hole puncher to punch a small hole where it says "PIN HERE" at the top. Your tag and the tag hole are now reinforced. DO NOT COVER THE BARCODE WITH TAPE--the barcode scanner will not be able to read it if you do.
You may also laminate your price tag, but you must ensure that the barcode is clear.
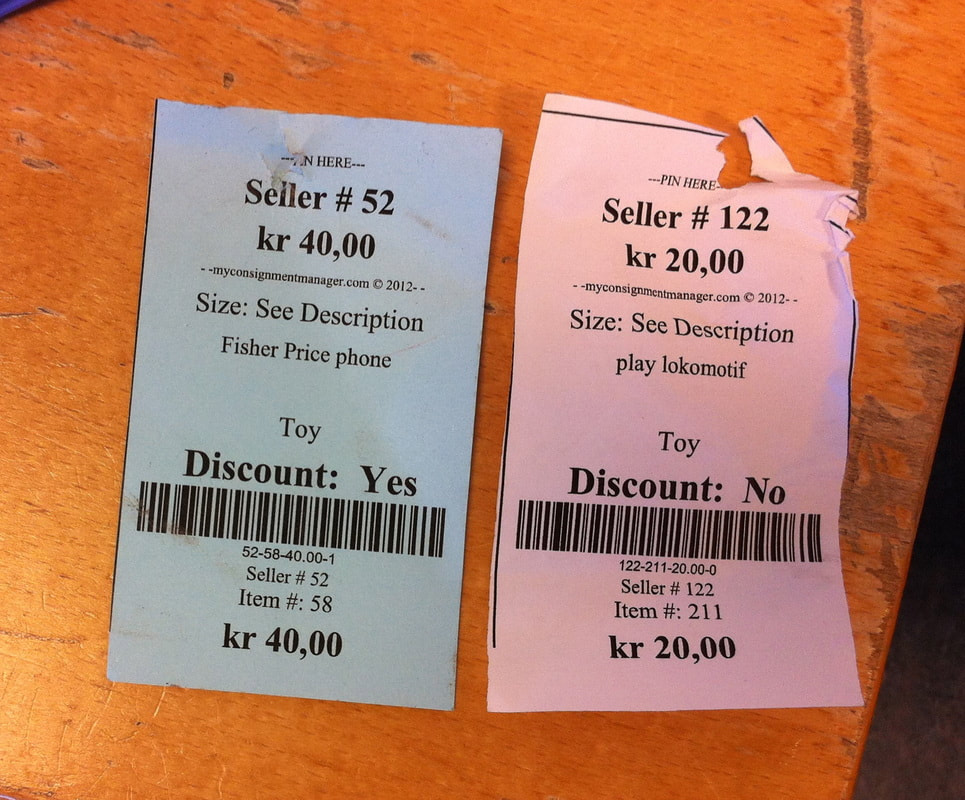
This is what happens to your tags if you do not follow our tagging instructions -- they rip and fall off! Make sure you use thick paper and reinforce the tag!! (This photo shows an older version of our tags--we use a different tag now).
|
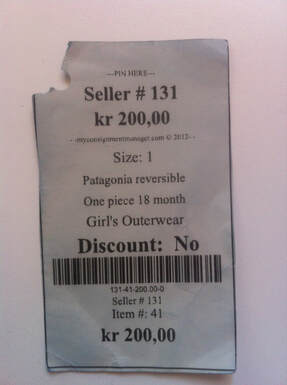
This tag was printed on thick paper, but was not reinforced with tape at the top, so the tag ripped off.
(This photo shows an older version of our tags--we use a different tag now). |
STEP 3: ATTACH
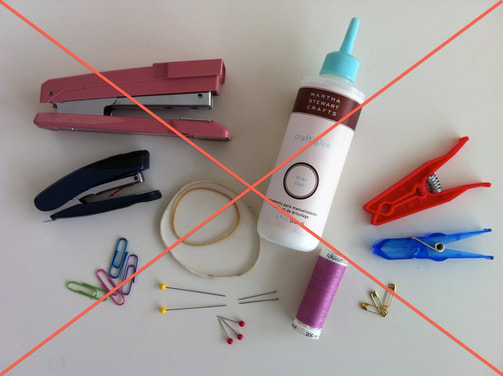
We cannot stress enough the importance of securely attaching your tags. Most of the tags that fall off items at our sales were improperly attached and/or printed on thin copy paper. Do not under any circumstances use the following to attach your tags (note that these photos show the older version of our tags):
USE ZIP TIES TO ATTACH YOUR TAGS.
Our preferred method of attaching tags is to use zip ties. Here are hints for attaching tags:
For added security (in case tags fall off or pieces get separated), write your seller number on a piece of tape and affix to your items. Write your seller and item number on plastic bags with a permanent pen.
If items have multiple pieces that might get separated, please attach handwritten tags to each item. Do not print multiple barcoded tags for the same item--only ONE barcoded tag for each item, please. Each tag should include your seller number, item number, a description of the item, and both the part number and the total number of parts (for example: 1 of 6, 2 of 6, 3 of 6, etc.).
- Clothing: Loop zip ties through the clothing or washing label, belt loops, button holes, or zipper holes. If there is no place to loop a zip tie through, you will have to attach the tag with a sturdy safety pin or tagging gun.
- Equipment/Toys: If there is a place for you to attach your tag to your item with a zip tie, please do that over taping it. You can put items (like toys) in heavy duty plastic bags, punch a hole through the bag, and loop a zip tie through the hole to attach the tag. Alternatively, you can tape your tag to the inside of the bag, but this is less secure (make sure you do not cover the barcode). Keep in mind that shoppers often open plastic bags, and the contents get strewn everywhere.
- Books: Use painter's tape or masking tape to attach your tag (easier for the cashiers to remove than packing tape). Do not cover the barcode!
For added security (in case tags fall off or pieces get separated), write your seller number on a piece of tape and affix to your items. Write your seller and item number on plastic bags with a permanent pen.
If items have multiple pieces that might get separated, please attach handwritten tags to each item. Do not print multiple barcoded tags for the same item--only ONE barcoded tag for each item, please. Each tag should include your seller number, item number, a description of the item, and both the part number and the total number of parts (for example: 1 of 6, 2 of 6, 3 of 6, etc.).
DO NOT USE THESE ITEMS TO ATTACH YOUR TAGS:
Updated 05.06.2023